

The Homebrewer’s Guide to Tubing
Homebrew needs to be transferred. Sometimes we can get away with pouring wort or beer manually, but for the most part the best way to move liquid around is with a hose or tube.
When you get into homebrewing you'll become intimately familiar with tubing. Sometimes you bless it for saving your aching back the trouble of lifting 5 gallons of liquid. Other times you curse it, like when you're siphoning into a carboy only to realize the end of the tubing curled up and you're now shooting beer across the kitchen.
Tubing comes in all different sizes and varieties. Though we don't think of it as a major tool in our brewing arsenal there are still plenty of decisions we need to make about it. Every time you buy a new gadget that requires tubing you have to make one of these calls.
There have been plenty of times where I've made the wrong one.
I put together this guide to save you some mental energy and make quick & easy decisions about what tubing to use.
Types of Tubing
There are all sorts of materials used for tubing. Here are the most common ones for homebrewing:
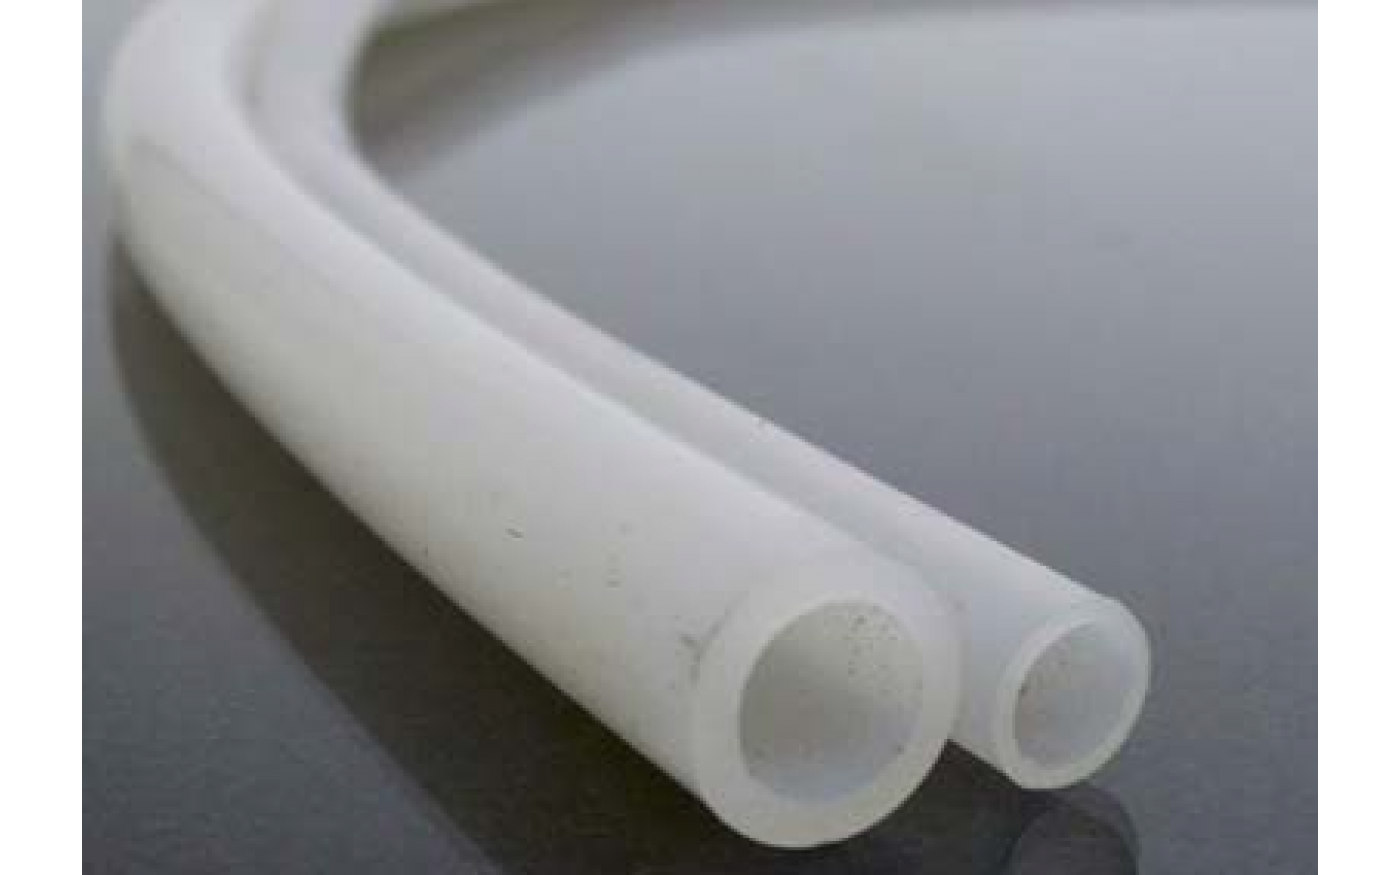
Vinyl Tubing
This is the cheapest and most basic tubing you'll find. It's what the hardware stores carry. Some brands are marked as food grade and others are not. If you have the choice go with food grade. Watts is the brand you'll usually find in Home Depot and Lowe's, and it is food grade up to its maximum temperature of 175°F.
There is still some hesitation to use this cheap vinyl tubing for beer. I say that it is fine to use as long as it's at cool temperatures. Don't use it with hot wort. Also, since the beer is not sitting in the tubing (it's only used for transferring) there isn't as much a risk of leaching. Always make sure to replace your vinyl tubing if 1) The inside becomes dirty and it can't be cleaned, or 2) You notice a plastic-like flavor in your beer. In that case I would switch brands.
The great thing about vinyl tubing is that it's cheap and easy to find. The downside is that it's notorious for curling at the end. Add an extra foot to whatever length you were going to buy to account for the curling.

Vinyl tubing
Reinforced Vinyl Tubing
This tubing is stiffer than plain vinyl tubing and can handle higher temperatures. I've used it it but I haven't found a great use for this type of tubing. It's much more inflexible than plain vinyl and still can't handle high enough temperatures for use while brewing. Reinforced vinyl is sometimes used in high pressure systems and commercial draft beer applications, but for most homebrewers it's not of much value.
For siphoning I recommend you go with plain vinyl, and for hot wort transfers I recommend you go with this next one.

Reinforced Vinyl Tubing
Silicone Tubing
This is my favorite tubing for transferring hot wort. You really want to be selective when choosing tubing for the hot side. I see too many brewers using plain vinyl tubing for transferring hot sparge water. Not good! Use a tubing rated for high temperatures, like silicone.
Silicone tubing comes in many different sizes and can handle temperatures up to 500°F. It's also very flexible and doesn't curl like vinyl tubing does. In fact, I've tried it out with siphoning and it worked great. The end of the tubing goes right to the bottom of the keg or bottling bucket and stays there. The downside is that it's not clear, but give it a shot sometime and you may not go back to vinyl.

Silicone Tubing
Other high temperature tubing
Though silicone is the most common among homebrewers there are a number of other high temperature brands that people use, including:
- Santoprene
- Thermoplastic
- High Temp™ PVC Free
Beverage Tubing
This is vinyl tubing but it's higher quality than what you buy at the hardware store. Put them side by side and you'll immediately notice the difference. Beverage tubing also has a thicker wall to handle the higher pressures of a draft system. Purchase it from a homebrew store or a draft beer supplier.

Beverage Tubing
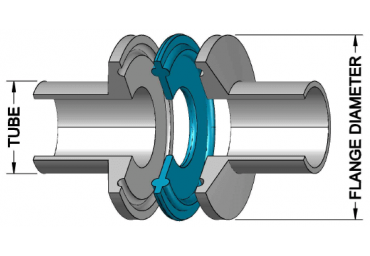
Tubing Sizes
The size you use is primarily driven by what you're connecting it to, usually either a metal barb or a plastic piece like the end of a racking cane or bottle filler. Sometimes you get a perfect fit and sometimes you need a little help. There's almost always more than one size tubing that will fit.
If the tubing is too small then put the end of it in very hot water. It will make it flexible and you'll be able to push the tubing onto the barb or racking cane.
If the tubing is too large then use a clamp. I always have a plastic bag filled with worm clamps just in case. It's a good practice to clamp every tubing connection just to be safe.

Every brewer should have a bunch of clamps on hand in various sizes.
The good thing about larger tubing is that you can transfer the liquid more quickly. I use 1/2″ on the hot side and it takes no time at all to transfer between my hot liquor tank, mash tun, and boil kettle. The downside is you are more prone to air bubbles if it's not a great fit.
The reverse is true with tubing that is smaller. It will take longer to transfer but you'll get less air bubbles. This is especially important on the cold side where you don't want to aerate your beer. 3/8″ tubing is most often recommended for siphoning but you can usually use 5/16″ as well. I've found you get much less air bubbles by squeezing on 5/16″ tubing. It just takes longer to transfer.
Tip for getting a good flow on the hot side: If you're using larger tubing always make sure it's the right size for the fitting. For example don't use 1/2″ tubing on your boil kettle when the hose barb coming out the valve is only 3/8″. You're going to get a bunch of bubbles and poor flow. Assuming you're tubing is the right size, here is a tip for getting a good flow:
- Pinch the tubing about 4 inches from the valve and pull the tubing down below the valve.
- Slowly open the valve and let the wort back up at the pinched spot until there are no air bubbles.
- Open the valve all the way and release the tubing.
- Make sure to keep the end of the tubing lower than pick-up tube in the kettle.
Once the liquid gets below the valve in the kettle it will create a siphon via the pickup tube in the kettle (if you have one). If you keep the end of the tubing low and prevent air bubbles you'll get the most liquid possible out of the kettle.
Guide to Common Tubing Sizes
Here's a table that with the most common tubing sizes used in homebrewing. It is sorted from smallest to largest and all sizes are for the inner diameter.
| TUBING SIZE (I.D.) | USE |
|---|---|
| 3/16" (0.188) | The size used for beer line in most homebrew draft systems. |
| 1/4" (0.25) | Used for gas (CO2) line in some draft systems. |
| 5/16" (0.313) | The most common size used for gas (CO2) tubing in a draft system. Also used for siphoning where a tight fit is desired. |
| 3/8" (0.375) | Most common size for siphoning. Also used on bottle fillers, aeration wands, and hot side transferring. |
| 1/2" (0.5) | Most commonly used for hot side transferring. Also used in some siphoning set-ups. |
| 3/4" (0.75) | Used in larger (10+ gallons) homebrewing set-ups on the hot side. |
Cheat SheetThe above is pretty lengthy so if you're saying to yourself “Just tell me what to use!”, here you go. This is a cheat sheet for various brewing applications. I'm assuming you're brewing the typical 5 gallon batch. For transferring hot wort during brew day use 1/2″ silicone tubing. Make sure to use 1/2″ valves and barbs along with worm clamps. Alternatively you can use the tubing with quick disconnects like what I use on my Brutus 10. 3/8″ fittings and tubing is common on homebrew setups but if you go up to 1/2″ you'll thank me for it, trust me. For your pump you'll want to pay close attention to the PSI rating of the tubing. It must be able to handle the pressure from whatever pump you are using. For March pumps (most common) most homebrewers use the silicone tubing mentioned above. That's what I use and it works great. For your siphon use the 3/8″ auto-siphon with 3/8″ vinyl tubing along with a worm clamp. If you're impatient you can go with the 1/2″ version. For your bottle filler use 3/8″ vinyl tubing along with a worm clamp (if you get bubbles, but it's usually a good fit). For blow-off tubes it really depends on the fermenter and the size of the rubber stopper you are using. I recommend you take your stopper into the hardware store and find the right size of vinyl tubing that will snugly fit into the hole in the stopper. Alternatively, you can ditch the stopper altogether and get a very large piece of tubing that fits directly into the neck of a carboy. For your beer line use 3/16″ vinyl beverage tubing. Make sure it's the high quality stuff from a homebrew store. Don't use hardware store tubing. For your CO2 line use 5/16″ vinyl beverage tubing. You have a choice here between red, blue, or clear. Personally I prefer the colored tubing because I can easily distinguish it from my beer line. That really comes in handy when I have 5 kegs hooked up in my kegerator. Some people prefer clear because they can see if beer is backing up into the gas line from the keg. It's up to you. From https://homebrewacademy.com/homebrewers-guide-tubing/ |